Tuning the Ruger Charger
Pistol
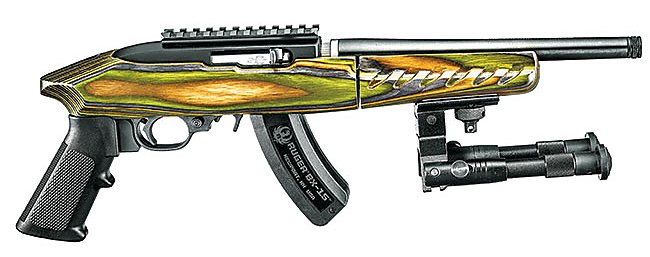
The work shown features a
Ruger Charger Pistol take-down model in the illustrations but virtually all
aspects of the various parts tuning and action bedding applies equally to
the 10/22 rifle in both standard and take-down models. For a more
detailed view, click on each illustration to see the enlargement.
|
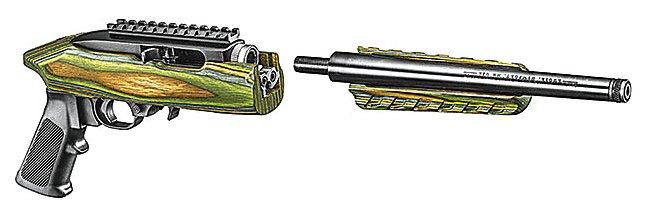
The Ruger Charger take-down model has
the potential to be an outstanding survival weapon because it takes down
into two parts, neither of which exceed 11 inches in length and will fit
into a compact carry case. Based on the proven reliable 10/22 rifle
action, they have the potential to be accurate. As sold by Ruger,
however, the actions are roughly machined. With a little time and effort
they can be accurized. My Charger would not shoot better than 2 ½'’
groups at 25 yards so it really needed to be tuned up.
The trigger
pull on my Charger was 6 ½ lbs of gritty, overly-long travel. Two pins
and the trigger group was removed from the action and ready for work.
|
 |
|
 |
TRIGGER WORK
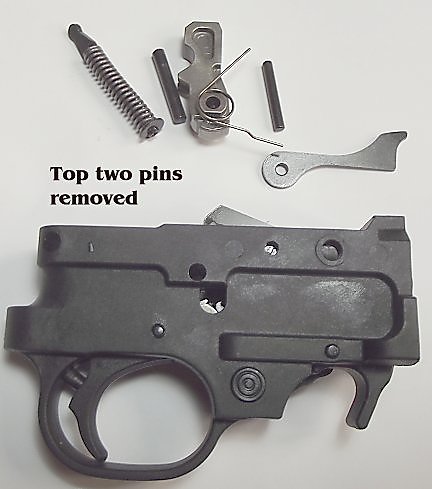
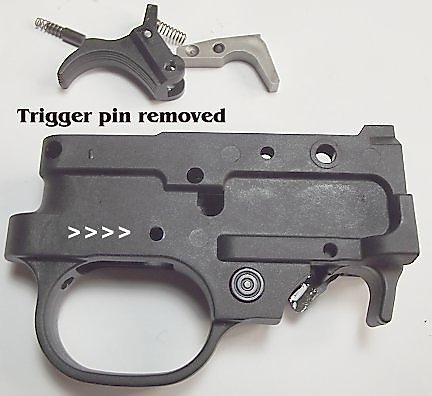
Above left, the trigger group has been removed from the
action. That only entails the removal of two pins. Then the two
highest pins on the trigger group are removed so the hammer, hammer spring,
ejector and hammer spring can be removed. Above right, the pin holding
the trigger and sear has been removed and those parts shown in the order in
which they fit together. Don't lose that small spring!
IT IS TIME TO DO SOME POLISHING
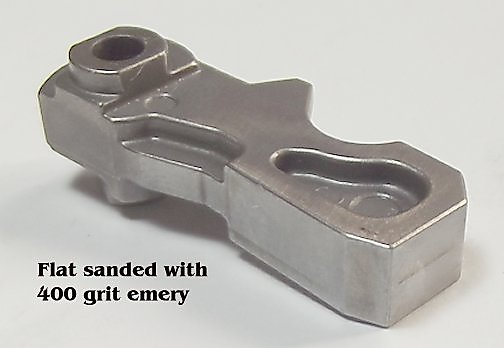
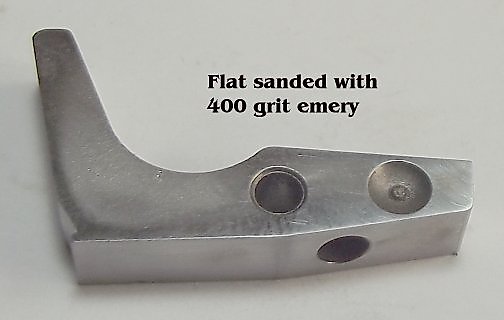
The hammer (above left) and the
trigger sear (above right) appear to be rough investment castings. I
flat-sanded every flat surface with 200 grit emery, then repeated the
process with 400 grit emery. There are many Youtube videos showing how to
file the sear notches to lighten the trigger pull.
MODIFYING THE BOLT HOLD-OPEN LEVER
While the trigger group is apart is a
good time to work on the bolt hold-open lever. The
factory bolt hold-open lever is double-duty and must be manipulated to
release the bolt to travel forward. A hot aftermarket item is an automatic
bolt release.
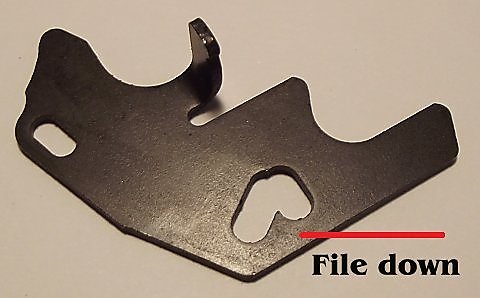
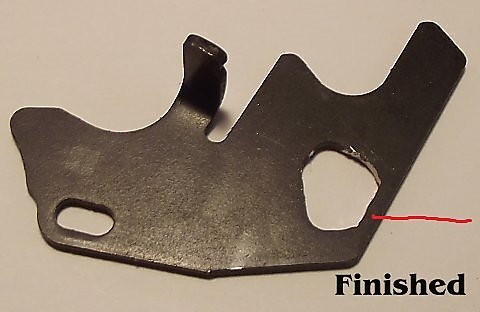
Look at the illustrations at right and
you will see that a chainsaw file can easily remove some metal so the bolt
release is automatic. How much to file down? The point in the
left photo above must be filed down and the "web" remaining between the new
hole should be the same thickness as the web on the small hole on the left
side. Now when you pull the bolt back it is free to slide forward
automatically without fumbling with the small release lever. This
modification just saved $20.00, the cost of a new replacement automatic bolt
release.
FLAT SAND THE BOLT
|
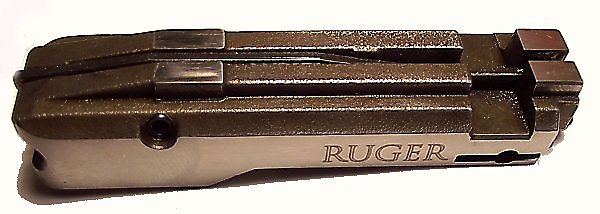
The bolt was roughly
machined and any roughness leads to dirt & grit accumulation, to say
nothing of creating friction on bearing surfaces. At right is the top of
the bolt. It was polished mirror bright, then a brick of ammo fired. The
wear marks are clearly visible in the polished surface. |
 |
|
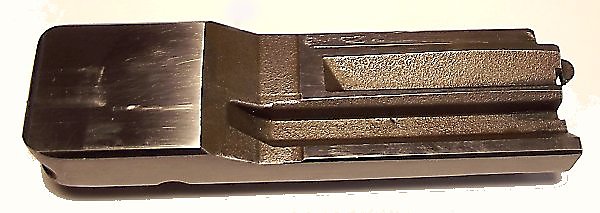
At right, the bottom of
the bolt. Note the visible wear marks where the flat bottom of the bolt
cocked the hammer during recoil after each shot. The surface was mirror
smooth, as was the mating hammer surface. Without polishing those two
surfaces would have created considerable friction. |
 |
REASSEMBLY OF THE TRIGGER GROUP
|
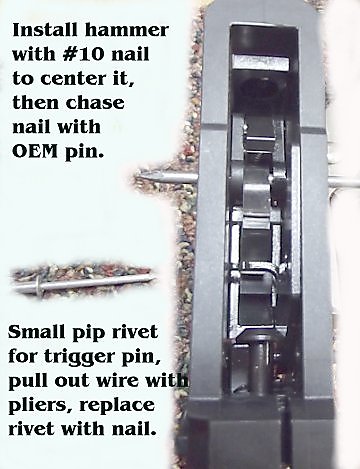
Reassembly of the trigger and sear
can be difficult. I used Scotch Tape to hold the trigger return spring
and plunger in as the trigger and sear were positioned in place. There
is nothing to hold the two sear levers in place but there is a small
spring to pop them apart, so I used a 22 gauge wire to hold the two
pieces together and the spring compressed while lowering the trigger
group into the trigger housing. A thin nail will fit through the hole
for the trigger pin with room for the copper wire to hold the assembly
in place. The wire can then be pulled out with pliers and the thin nail
chased out of the pin hole with the proper pin. |
 |
|
At right the trigger group is
being reassembled. Small nails are used to hold the parts in place, then
the small nails "chased" from the holes by the proper pins. It just
makes things easier. There are many Youtube videos showing the
step-by-step reassembly process.
Before the trigger group can be reinstalled in the
action, the bolt needs to be flat sanded to eliminate all possible
friction to maximize action life and eliminate chances for parts
breakage. Ruger sells a replacement "BX trigger" for $75.00, and I
bought one. Long, gritty pull and not crisp at all. The trigger I
modified as shown here has a 3 lb pull with a crisp let-off, much better
than the BX trigger. |
 |
MAKING A BUFFERED BOLT STOP/RECOIL PIN
|
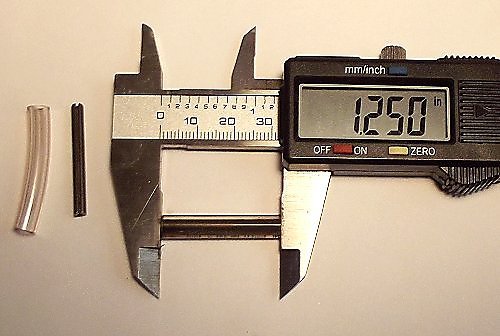
The OEM bolt stop pin is 1/4" x 1
1/4" of solid steel. When the bolt recoils hard from the use of high
velocity ammo, the back of the bolt slams into that pin. Buffered pins
are sold as aftermarket items but it easy to make them. At right is a
1/8'’ hardened steel roll pin and a 1/4'’ vinyl hose with a 1/8'’ hole
in the middle. Push the roll pin through the hole in the hose and the
result is a savings of $10 to $20 for an aftermarket pin. |
 |
It is now time to reassemble the
action and install it in the stock. There are Youtube videos which show the
step-ty-step process of reassembly, if needed.
THE ACTION IS NOW SMOOTH AND THE
TRIGGER PULL LIGHTENED
|
The Charger was reassembled and
tested. Bad news. Now that it was easier to test for accuracy, shooting
groups instead of patterns, the groups showed a distinct vertical
spread.
Group showing the barrel needs to be bedded. The
forearm had too much upward pressure on the barrel so wood was removed
to free-float the barrel, then glass bedded. |
 |
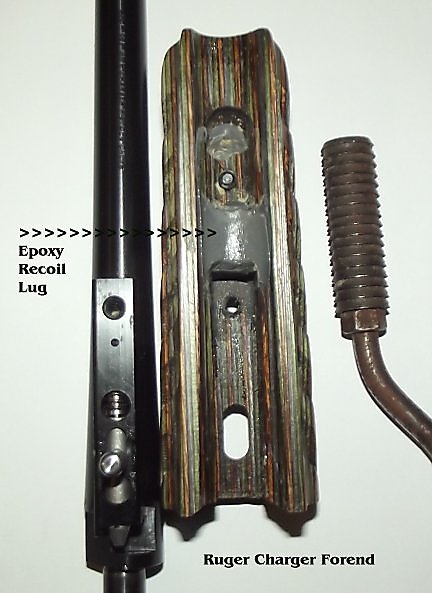 |
The forend on the Ruger Charger takedown has a
deep groove all the way from the action to past the sling swivel screw. There
is no recoil lug at all! Plumber’s putty was used to make dams between the
action screw and sling swivel screw to contain the bedding compound, and JB
KWIK Weld put between the two dams to
form a recoil lug to hold the forend securely against the barrel.
THE ACTION NEEDS BEDDING
|
Bench rest shooting with a
now-smooth action and trigger and bedded forend eliminated the distinct
vertical group stringing. The horizontal spread shows the action needed
to be bedded. The action screw was examined and was too long (bearing
against the barrel tightening band) so it was shortened 1/8" to properly
pull the action firmly into the stock. |
 |
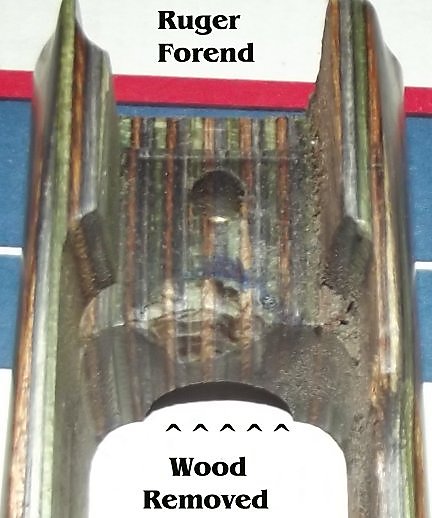
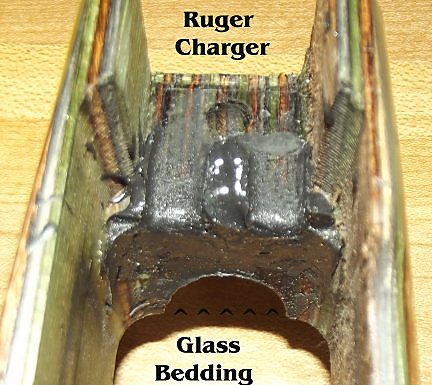
BEDDING THE ACTION (Remove the
trigger group BEFORE glass bedding.)
|
 |
 |
 |
| Wood removed for recoil lug |
Recoil lug glass bedded |
The rear of the action
bedded |
Note the photo above right. The area
of bedding that is rough, right in the lower center, must be filed back a
bit to clear the trigger group. Had the trigger group not been removed
it would have been glassed solidly into the stock forever when the
glassbedding compound extruded from the rear of the action. With the
action now firmly bedded into the stock it cannot move and shift position
during recoil.
AFTER ALL THE TUNING AND BEDDING
|
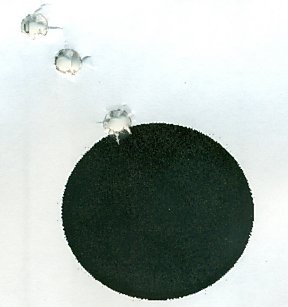
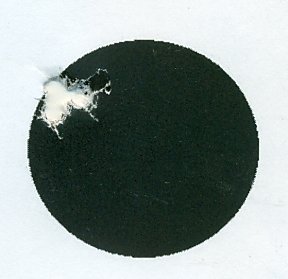
It was all worth it. The group
shown at right was shot at 25 yards from a bench rest. All three holes
touch. Shooting conditions were abysmal with wind, rain and failing
light. That is a good group considering the weather conditions and a
cheap 2X forward eye relief scope. This Ruger Charger now shoots well
enough to justify replacing the scope with a quality 2x - 6x pistol
scope to extend the range potential for accurate shot placement.
Accurate shot placement plus the ability to lay down a withering barrage
of fire from high capacity magazines makes the Charger a very versatile
pack pistol. |
 |
POINT OF IMPACT SHIFT
|
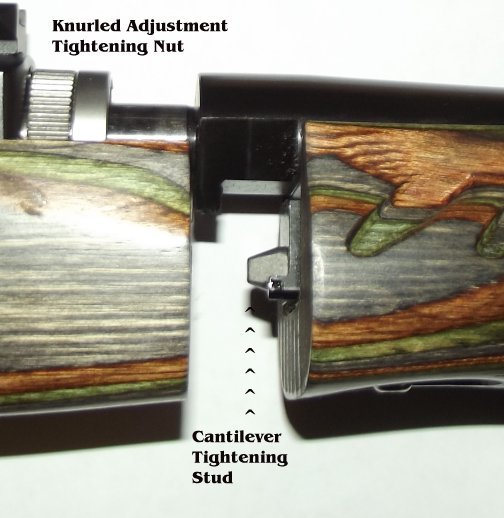
There is still a point-of-impact
shift of up to an inch at 25 yards when the barrel is removed and then
reinstalled. The problem is the tension post/stud on the rear of
the barrel half bears on a
plate 1/2'' or so beneath the barrel - there is always a slightly different
upward
pressure on the barrel in lockup and no way to solve that problem I can see
because the barrel itself is not threaded. This would not be a problem
for the fixed barrel Charger and 10/22. |
 |


