|
A guide to self reliant living |
|||||||||
|
6. Kerosene heaters and cookers
12.
Electrical; generators
Miles Stair's
SURVIVAL Miles Stair's
SURVIVAL |
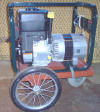
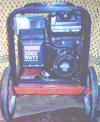
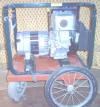
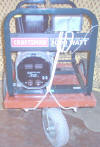
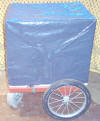
BUILD A GENERATOR CART Let's face it - generators are heavy. Carrying them around can hurt your back. So what do most people do? They leave the generator in one place and run very long extension cords to the appliances they are running, completely forgetting about voltage line loss. It's better to move the generator to where it can be as close as possible and use shorter extension cords, and having the generator on a cart can make that relatively easy. The cart should be built so that its platform fits the base of the generator as closely as possible. Built that way, the generator will not take up too much room in storage. I used 3/4" plywood as the base, 12" wheels on a half inch axle in the back, and an 8" pneumatic, ball bearing swivel caster wheel in the front (Northern Tool, part #189210-1404, $19.99). To make the platform of the cart level, the rear axle is on a 2x4 glued and screwed to the plywood base. With the big wheels, pulling the generator cart over rough ground is not difficult. The tricycle wheel arrangement on the cart means that no matter the ground surface, all three wheels will be in solid contact with the ground. Before starting the generator, I push the cart backward a foot or so to move the caster wheel as far forward as possible, just to increase the wheelbase and therefore the stability of the cart. Note that the generator pull start rope is over the solid rear axle, not the swivel caster! The generator is attached to the cart only with strong rubber tie down straps. They are sufficient for keeping the generator secured to the cart, but are easily removed if need be. For handy storage purposes, I chose to use a rope to pull the generator cart instead of a solid wagon-type handle. Also for storage purposes, I kept the box in which the generator was sold, cut out the bottom, then covered it with 6 mill black plastic securely taped in place. The box fits very nicely over the generator, can be removed in an instant, and the generator is always clean and ready for use! The photos below are thumbnails. Click on a photo to see the full size image, then use the "back" button on your browser to return to this page.
________________________
|
HOME
|
PROPHECY |
PREPARATIONS |
QUICKENING NEWS |
COMMENTARY BY MILES |
| GUEST SUBMISSIONS | BOOKLETS BY MILES | CONTACT INFORMATION | | LINKS | RADIATION INDEX & JET STREAM | DEVOTIONAL ITEMS | | PHOTO INDEX | LIBRARY | SURVIVAL SHOP |
|
|||||||

